Showing posts with label garage gym. Show all posts

Monday, January 2, 2012

CrossFit Home Gym: How to Hang Gymnastic Rings part II

In my first post about hanging rings, I showed you how I put up my personal set of rings in my garage. Over the holiday break, Ditty and I traveled to her parents house and I had another opportunity to hang rings. This time it was for my father-in-law, E, who had gotten us into CrossFit in the first place. (Two years ago he competed in the Masters Division at the South Central Regional CrossFit Games) He had a pair of gymnastic rings hanging outdoors on a pull up bar, but my new brother-in-law and I had the idea of putting them in the garage. Since the setup is different than mine (and probably more like many of you out there) I thought I'd share pictures and descriptions of what we did. 

 To give you an idea of the setup, we were working with a two car garage with 15ft. high ceilings. E wanted the rings pretty much in the middle of the garage so that he would face perpendicular to the garage doors. Luckily, there was a crawl space/small attic above the garage attached to one of the bedrooms.

 One of the biggest tasks was just getting the plywood up off the joists. The claw hammers we had did not grab the wood at the right angle, so it made for a time consuming task of pulling nails up. Eventually we drilled holes large enough at one end to pull the plank of wood up. (see above: there is a square cutout of the plank on the right side)

 After pulling the plank up, we used a tow webbing that was about 25ft. long and draped it across two joists. They acted as both supports so the load was spread out over two joists and also as extensions for the rings to hang from. We then used a drywall saw to cut holes for the webbing to drop down into the garage. Then we drilled holes in the joists and posted U-bolts to keep the webbing from swaying along the joists.

 In order to get the right length of the very long webbing, E was downstairs and attached the rings. We pulled up the slack until he thought they were a good height and then we tied it off using an alpine butterfly knot. (you can probably use any knot that won't loosen, but we just happen to run across this one as we were Googling) After we were finished, we nailed the plank back into place to further hold the webbing and knot in place. (You can also see the back of the U-bolt on the left joist)

 Here is a view from below. As you can see, the webbing made for a very convenient extension and already had extremely strong loops sewn into the ends. All we had to do was connect carabiners!

 Rings at push up level. (Jealous of that rower in the background? me too)

 A view to the outside of the garage.

E on ring push ups. Getting it done.

The next day we did a WOD Fight Gone Bad style (5 stations, 3 rounds of 1 minute of work at each with 1 minute of rest in between rounds)
Wall ball
ring push ups
sit ups
kettlebell swings
Prowler push

After doing a number of ring push ups (and handstand ring push ups) I can personally attest to the stability of the ring setup. If you have a similar setup in your home, go spend a few dollars on webbing and carabiners and get it done!

Thursday, December 8, 2011

CrossFit Garage Gym: DIY Pull Up Bar

After hanging my Rogue gymnastic rings, the next project for the garage gym was to make my pull up bar. After doing eleventeen million hours of research on the best setup, I came down to three criteria that were important to me:
1. It had to be affordable (read: under $100)
2. It had to support at least two people (my wife and me)
3. It had to be off the ground so a car could park in the garage

completed pull up bar. BOOM!
After those three criteria were established, I realized buying a pull up setup from Rogue, Again Faster, or Stud bar was not going to be affordable (over $100 for just one pull up setup, plus I needed at least two). So once the prefabricated options were eliminated, then I had to decide how to use galvanized pipe. Our box has a great homemade setup (done by Aimee Lyons' dad) with pull up bars running from the ground up and over to the wall, but that would conflict with rule 3. (does anyone else feel like this is "I, Robot" with their Three Laws?) Since I liked the simplicity and design of what Aimee's dad did, I took it and turned it upside down. By lagging it into the ceiling joists, the pull up rig was off the ground, it could support three people, and it was under $100. Sweeeeet. 

"Before" picture. Bumpers are in place though. 
I won't go into the exact details because everyone's situation is going to be a little different, but here are my general specs, all of this can be bought and cut to size at Lowes or Home Depot (cutting was free):
1. I used 1.5" galvanized pipe and flanges from the ceiling down to have a more sturdy support. I probably could  have gotten away with 1" pipe, but I also wanted a thick bar pull up station (the middle lateral section). 

1.5" galvanized pipes from ceiling and across 
2. For the pipes running into the walls, those are 1" thick galvanized pipes and flanges. They are attached to the 1.5" connectors with the elbow, 5" nipple, and reducers shown below. These were each 36" long. Long enough for most people's grip on pull ups, but not too long to bump into the garage door opener. 

detailed view of 1.5" pipe, T connector, reducer, 5" nipple, elbow, and 1" pipe to wall
3. There are 3 sets of lag bolts (6 bolts total) into the ceiling because there are 3 ceiling joints running across the garage, spaced 24" apart. There are 4 sets of lag bolts (8 total) into the walls as there are 4 studs spaced 18" on center. 
4. I forget the exact size of the lag bolts, but I used two different sizes. One size was to connect the flanges to the 2x6 wood supports (about 3/8" x 1.5" long) and another size to bolt the 2x6s to the studs or joists (about 5/8" x 3.5" long)

detailed view of 1" pipe into flange, lag bolted into 2x6 which is lag bolted into wall studs
5. As noted in the How to Hang Rings post, other tools used were a stud finder, electric drill, wrenches, and elbow grease.
6. To give you sense of scale, the ceiling is 10ft. high and the width of the garage is 11ft. In the video at the bottom, I am 5'9" and if I'm on the bars, my feet are just off the ground. (this was planned in figuring out the dimensions of the pull up rig)

Weights are good for more than just lifting
I assembled the pull up bar on the ground, but then had the predicament of getting it up and bolted in. As you can see in the picture above, I had quite a time getting the whole contraption up to the ceiling. While I could have asked people to come over and hold it up as I bolted the assembly in, I am stubborn and like to do things myself. (my wife would agree with me) So I made a pulley system and pulled the 40lb+ system up to the first 2x6 bolted to the ceiling. It worked! 

After my experience, here are some things to take away from it, no matter what your situation:
1. If you have money to spend, or you only need one pull up bar, the Rogue/Again Faster/Stud bar options would be a very easy and reliable system to get. ESPECIALLY if you are not a DIYer. 
2. Doing a lot of research, you tend to run into both the good and bad of any topic. I ended up finding some people wary of using galvanized pipe, since the flanges MIGHT crack. The best way to do it if you can is to put pipe through a solid piece of wood, there are some good posts and pictures of this on the CrossFit boards. There wasn't going to be an easy or cheap way for me to do it, so while there could be some risk, there are a ton of folks who have fine experiences (including our box which has had 25+ people on the same system). 
3. If you can, go from the floor up. This will give you better peace of mind since much of the force would be directed down and into the ground, plus if you space it right, you can use the vertical bars as squat/bench racks. (we do this at CF King of Prussia. John had to drill through the pipes and find brackets strong enough to hold heavy bars, but it's extremely worth it and saves a ton of space). 
4. tape the threads so you don't cut your hands if they get placed over them. Also, if you get your pipes cut, the machine might create some sharp indentations in the pipe, so you might have to tape over those too
5. If you have the ability (or money) to use an impact wrench, it will help get those lag bolts into the studs. I had a heck of a time first using a 36V hammer drill (yeah, I thought that would be good enough too!) but it only got the screws in halfway. The rest had to be done with a manual socket wrench. (Good workout for the arms!)

After all of this, I have a new appreciation for people who have done their own pull up systems. Even though you might look at pictures and think it's easy, it's probably not! But in the end, I have the satisfaction of having a custom pull up bar that I made. Plus, it meets all of my Three Laws. 

Here is a quick video of me explaining the pull up bars and demonstrating the sturdiness.


If you have any questions, hit me up in comments! 

Thursday, September 22, 2011

CrossFit Home Gym: How to Hang Gymnastic Rings


In looking for a new house, one of the big criterion I was looking for was space for a home gym. Although I am a trainer at CrossFit KoP, there are days where it would just be easier to bang out a workout at home. Now that we have a great home with a spacious 1-car garage, my goal is to create a home gym with the ability to park the wife's car in the garage. 


The first thing I had to do was paint the garage. It came with the house unpainted, so I just got some Behr exterior semi-gloss white and got to work. It took just about 2.5 gallon cans to cover the whole garage (19'x10'x11'). 


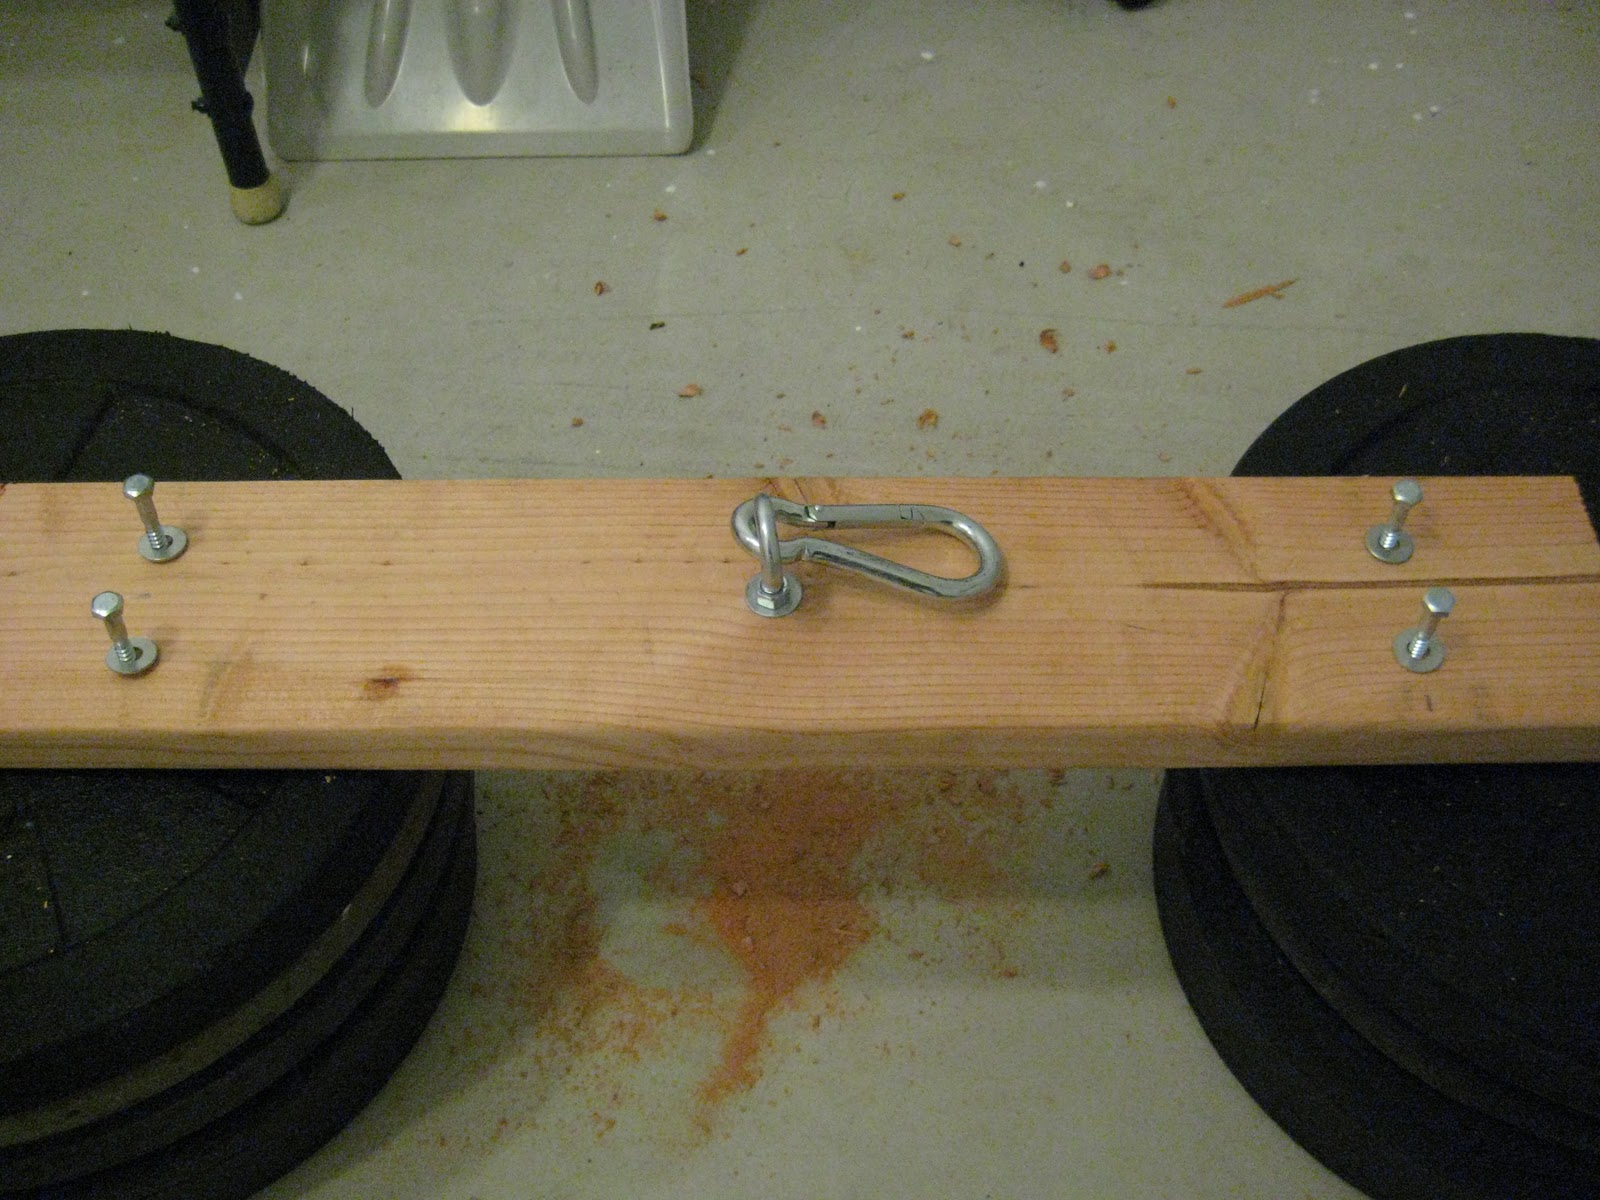
a close up of one of the supports (resting on Rogue bumpers)
I had already bought a number of Rogue things: a Rogue barbell, Bella barbell, bumper plates, clips, and the rings. The rings offer more versatility than a pull up bar, so my priority was to get the rings up first. Researching different methods from people on the CrossFit forums revealed numerous options. (I tend to do a LOT of research). The best combination for me was to brace the rings through 2x8 pieces of wood that were lag bolted into the ceiling studs (joists). This method allowed me to distribute the load across multiple beams, making it safe and stable.  See the video below to check out the full setup. 


updated 1/3/12 - general list of tools and hardware

TOOLS
stud finder (get one that finds the center of the stud, it will save you time - you get what you pay for, mine was $45 but way better than the $10 one I had originally)
drill and drill bits (standard set includes a variety of diameters)
socket wrench for lag screws
saw (if cutting the wood for your needs)

HARDWARE/supplies

2x6 piece of wood. I got an 8ft. length and cut it to size
lag screws/bolts - these grip the wood extremely well - you'll need 4 - 8 of these, depending on how many ceiling joists you have . Mine were 5/16ths of an inch in diameter and I used 8 total. They were 3.5" long
eye bolts - these are the circular things that hold the carabiners to the wood. 2 total and 3/8ths inch in diameter. Off the top of my head I forget how long, but just enough to go through the 2x8, so maybe 3 total inches including the eye
washers and nuts - get the same size as your eye bolts (mine were 3/8ths of an inch in diameter). these will distribute the load across the wood better. Use washers on your lag screws too. good idea is to get regular washers as well as "lock washers"
2 carabiners

something that you don't absolutely need but I did is to countersink holes in the wood so the nut and washer on top of the eye bolt was "in" the wood. For this you need special drill bits. Mine are "Ryobi forstner bits" from home depot.

there are a lot of great discussions on the CF forum, (mainpage) so check it out and do some searching around. Google is your friend!

For those with a crawl space above your garage, here is a solution for that setup:


Related Posts Plugin for WordPress, Blogger...

Blog has moved, searching new blog...